Apartment Panel Upgrade: Overcoming the “Hidden Pipe” Challenge

Hello from the team at The Electric Connection!

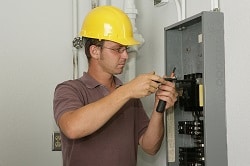
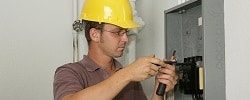
We wanted to share a behind-the-scenes look at a recent project we completed at a property in Los Angeles.

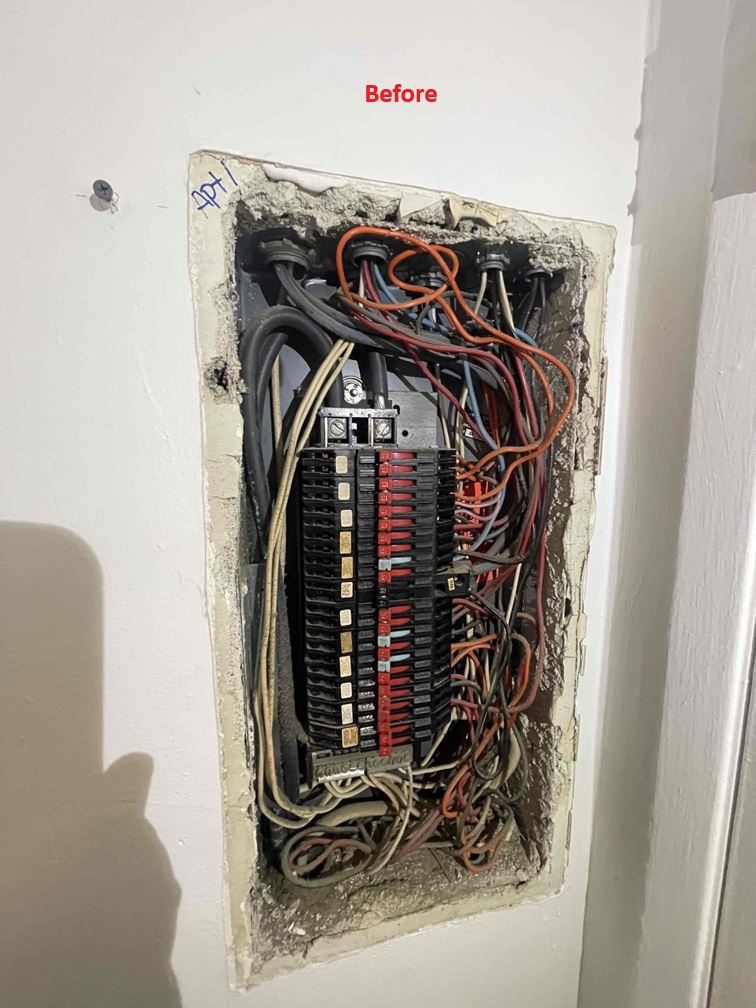
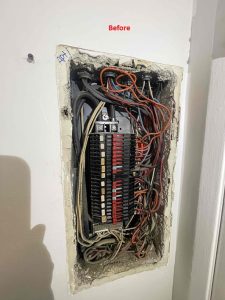
Electrical work in older apartment buildings often presents “surprises” once you open up the walls, and this job for Unit 1 was no exception.

The Challenge: A Tight Squeeze

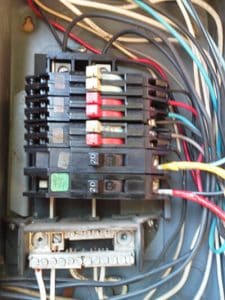
When we began the process of installing the new sub-panel for Unit 1, we ran into a significant roadblock. Upon opening the wall, we discovered a 1.5″ electrical conduit feeding the unit directly above (Unit 5).

The space was extremely restricted:

  • To the right: A door.
  • To the left: A closet.
  • Behind the wall: Another closet.
  • Structural Integrity: A 4×4 hold-down that we absolutely could not cut.

Our Professional Solution

Because we couldn’t relocate the panel, we had to get creative. We determined the best course of action was to cut the existing electrical pipe, intercept it into the new panel, and bypass it to continue up to the upper unit.

To make this work:

  • We replaced the rigid “hard pipe” with flexible conduit.
  • This required cutting the wall from top to bottom to allow for the necessary maneuvering.
  • Because of the pipe’s position, the new panel now sits about one inch away from the wall.

To ensure a clean, professional finish, we are installing custom 1″ wood trim around the panel frame.

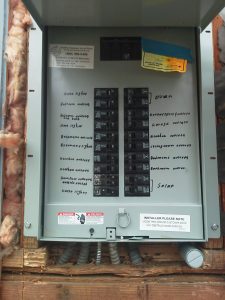
Results and Reliability

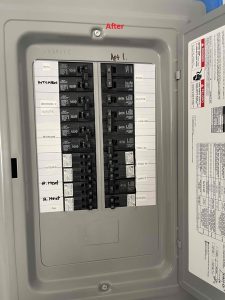
After a full day of work by our dedicated crew, Unit 1 now has a modern, fully labeled, and safely installed sub-panel. As you can see below, every circuit—from the kitchen to the FAU (Forced Air Unit)—is clearly identified for the tenant’s convenience.

At The Electric Connection, we pride ourselves on a “workmanlike manner” and provide a Lifetime Labor Warranty on our installations. Whether it’s a routine upgrade or a complex bypass like this one, we make sure the job is done right.

Need an electrical expert for your property? Contact us today at (818) 446-0888 or email service@electricconnection.com.

The Essential Steps to Replace a Circuit Breaker

Please note: we do not recommend attempting to replace a circuit breaker on your own if you have no electrical knowledge. You should have a good understanding of how your electrical panel and circuit breakers work, as well as a good amount of electrical knowledge. Instead of doing this on your own, please give us a call to help.

electrician working on electrical panel

Circuit breakers play a critical role in safeguarding our electrical systems by interrupting the flow of electricity in the event of an overload or short circuit. Over time, these vital components may require replacement due to wear and tear or malfunctions.

While electrical work should generally be performed by a licensed professional, understanding the process involved in replacing a circuit breaker can be helpful for homeowners and individuals with basic electrical knowledge.

electrical panel with circuit breakers visible

In this article, we will outline the essential steps to replace a circuit breaker safely and efficiently.

  1. Step 1: Safety First

    Before engaging in any electrical work, safety should always be the top priority. Start by turning off the main power supply to the circuit breaker panel. This can usually be done by flipping the main circuit breaker to the “Off” position.

    Additionally, wear appropriate personal protective equipment (PPE) such as gloves and safety goggles to protect yourself from potential hazards.

  2. Step 2: Identify the Faulty Circuit Breaker

    Next, identify the specific circuit breaker that needs replacement.

    Typically, each breaker is labeled to indicate the corresponding circuit it controls. However, if the labeling is unclear or absent, you can use trial and error to determine which breaker controls the affected area.

    Ensure that you have a suitable replacement breaker of the same make and model ready.

  3. Step 3: Remove the Old Circuit Breaker

    Carefully remove the cover panel of the circuit breaker box using a screwdriver. This will expose the individual circuit breakers.

    Locate the faulty breaker that needs replacement and loosen the terminal screws that hold the wires in place.

    Gently pull the wires away from the old breaker and detach it from the panel.

  4. Step 4: Install the New Circuit Breaker

    Take the new circuit breaker and align it with the empty slot in the panel.

    Make sure it is securely seated before tightening the terminal screws to connect the wires. It is crucial to ensure that the wires are correctly attached to the terminals to avoid loose connections or electrical hazards.

    Double-check the connections to ensure they are secure and properly positioned.

  5. Step 5: Test and Restore Power

    With the new circuit breaker installed, carefully return the cover panel to its original position and fasten it securely with screws.

    Now, it’s time to restore power to the circuit breaker panel. Flip the main circuit breaker back to the “On” position.

    Then, individually switch on the new circuit breaker and test the corresponding circuit to ensure it is functioning correctly.

    Look out for any signs of abnormal behavior, such as flickering lights or tripped breakers, and address them accordingly.

  6. Step 6: Seek Professional Assistance if Needed

    If you encounter any challenges during the circuit breaker replacement process or feel uncomfortable handling electrical tasks, it is strongly recommended to seek professional assistance.

    Licensed electricians possess the expertise and experience to handle complex electrical issues safely and efficiently.

replace electrical panel

Replacing a circuit breaker requires caution, attention to detail, and adherence to safety measures. By following the outlined steps and prioritizing safety at every stage, homeowners and individuals with basic electrical knowledge can effectively replace a faulty circuit breaker.

Remember, if you are unsure or uncomfortable with any aspect of the process, it is always best to consult a licensed electrician to ensure the task is completed correctly and without compromising safety.