


 Living in Beverly Hills often means owning a piece of history. Whether it’s a mid-century masterpiece or a classic estate that’s been in the family for generations, these homes possess a level of craftsmanship and charm that is hard to find in modern builds. However, as an electrician at The Electric Connection, I see the hidden side of these historic homes—the wiring behind the walls.
While the architecture may be timeless, the electrical systems often are not. If you’re considering an upgrade, here is everything you need to know about rewiring your home to meet modern standards while keeping your property safe.
Why “Old School” Isn’t Always Cool
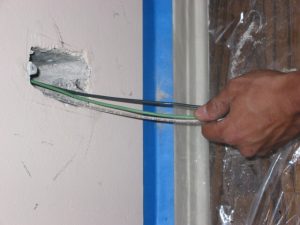
Many older homes in Beverly Hills were built more than 50 years ago. Back then, the average household used only a fraction of the electricity we use today. The most serious risk we encounter is outdated insulation—specifically cloth-insulated wiring. Over time, the cloth becomes brittle and disintegrates, leaving bare wires exposed. One small spark near old insulation or dust can ignite a fire. Additionally, we often find knob and tube wiring or ungrounded systems that simply aren’t designed to handle today’s high-tech electrical loads.
Professional Installation vs. DIY: The Pros and Cons
When it comes to a project as complex as a whole-house rewire, homeowners often weigh the costs of hiring a pro versus doing it themselves. Here is a breakdown of how those options stack up:
Hiring a Professional Technician
- PROS:
- Safety First: Keeps you, your family, and your home safe from fire hazards.
- Permit Management: Your electrician handles the paperwork and obtains all necessary city permits.
- Code Compliance: Licensed pros are up to date on ever-changing local electrical codes.
- Smooth Inspections: Professional work is far more likely to pass city inspections immediately.
- Liability Protection: Professionals carry insurance that protects you if anything goes wrong during the job.
- Speed: An experienced crew can complete a rewire much faster than a solo DIYer.
- CONS:
- Initial Cost: It is a larger upfront investment compared to doing the labor yourself. A lot of electricians will provide a ballpark estimate for a rewire by just calling.
- Finding a Match: It takes a little time to research and find a truly dependable, licensed electrician.
DIYing Your Rewire
- PROS:
- Initial Savings: You save on labor costs at the start of the project.
- Work at Your Pace: You can chip away at the project on your own schedule.
- CONS:
- High Risk: DIY rewiring puts lives and properties at risk of fire or shock.
- Time Intensive: You will spend weeks planning, drilling holes, and running wires through cramped spaces.
- Inspection Hurdles: Obtaining permits and passing inspections is much tougher for non-professionals.
- Insurance Issues: Many insurance companies will deny claims for fire damage if the electrical work was done as a DIY project.
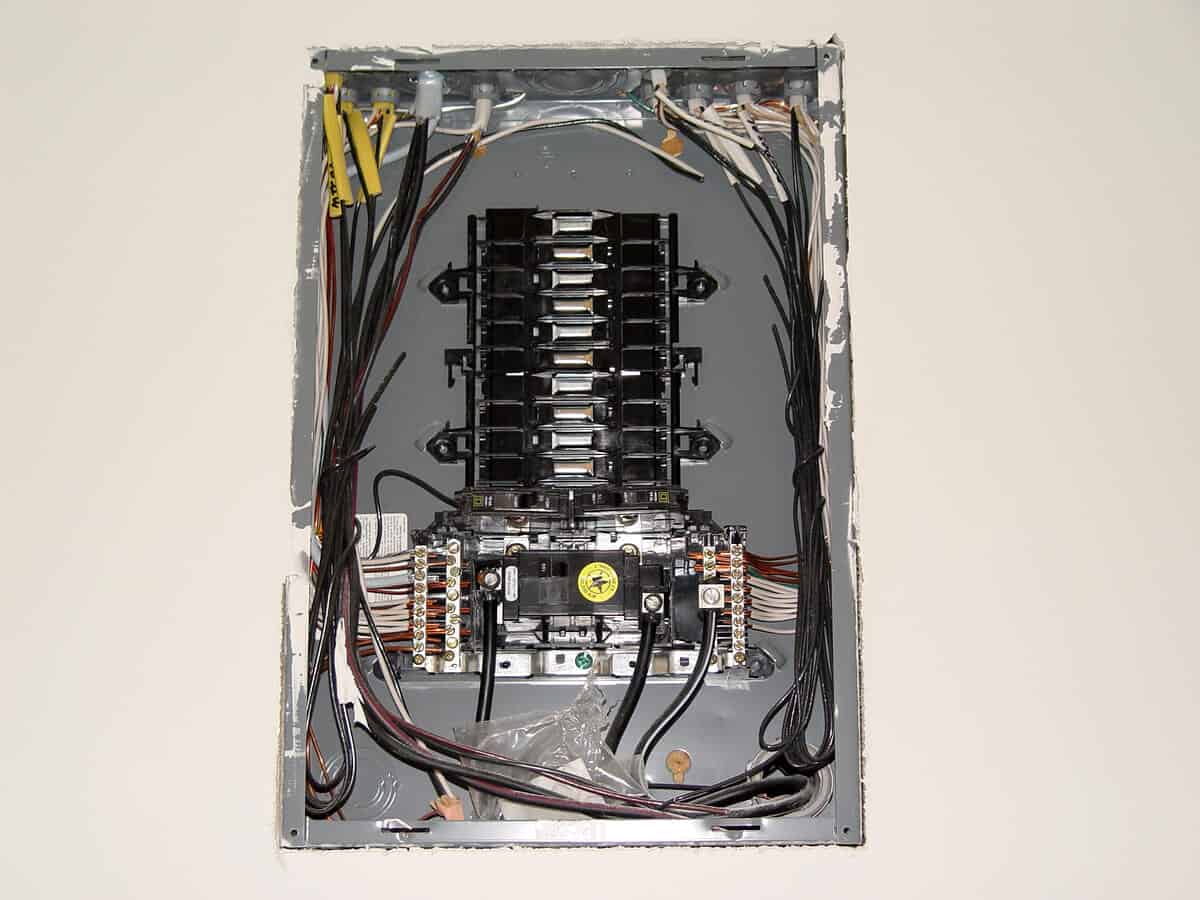
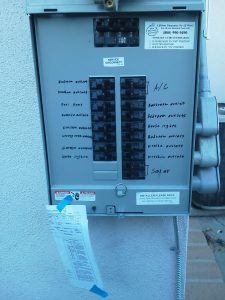
Modern Needs: Panels and Fixtures
When you decide to modernize, it’s about more than just safety; it’s about functionality. Modern homes typically require 100-200 amp service panels, whereas older homes might only have 60-100 amps. If your breakers are frequently tripping, it’s a clear signal that your home is crying out for more power.
A rewiring project is also the perfect time to:
- Install GFCI outlets in kitchens and bathrooms for shock protection.
- Add dedicated circuits for high-power appliances or EV chargers.
- Update your aesthetic with new lighting fixtures or landscape lighting.
What to Expect During a Rewire
We won’t sugarcoat it: rewiring is a major project. It involves running new wires throughout the house, which may require drilling small holes in walls or accessing ceilings. The power will need to be shut off while work is performed, and things can get a bit dusty. However, the right team can complete the job quickly and in a hassle-free manner, leaving your home safer and more efficient than ever.
Protect Your Investment
Your Beverly Hills home is one of your most valuable assets. Don’t let outdated wiring put it at risk. Whether you’re noticing flickering lights or just want the peace of mind that comes with a professional wiring inspection, our team at The Electric Connection is here to help. We’ve been serving the Los Angeles area since 1979, and we know exactly what it takes to bring a classic home into the 21st century safely.
Ready to modernize your home? Give us a call at (818) 446-0888 to schedule your inspection today.


 A safe electrical system is invaluable to every home and if you have a Federal Pacific Electrical Panel (FPE), replacing it is the best solution to ensure your electrical safety.
 Your house is not the scene of a horror movie. So, in most cases when you have heard a certain buzzing sound more than once, it’s probably real and not your mind playing tricks.
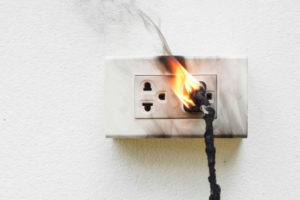 Your electric system works 24/7 providing the power you need to make life easier. While you might wish this efficiency can last forever, this is usually not the case.
 When something goes wrong with your electrical system, the first person you consider calling to fix the problem is an electrician.